Planning a Low-Tide Shore Walk Around What You Can See
Plan a low-tide shore walk around one visible feature, with a simple morning routine for noticing change without treating the beach as a fixed map.
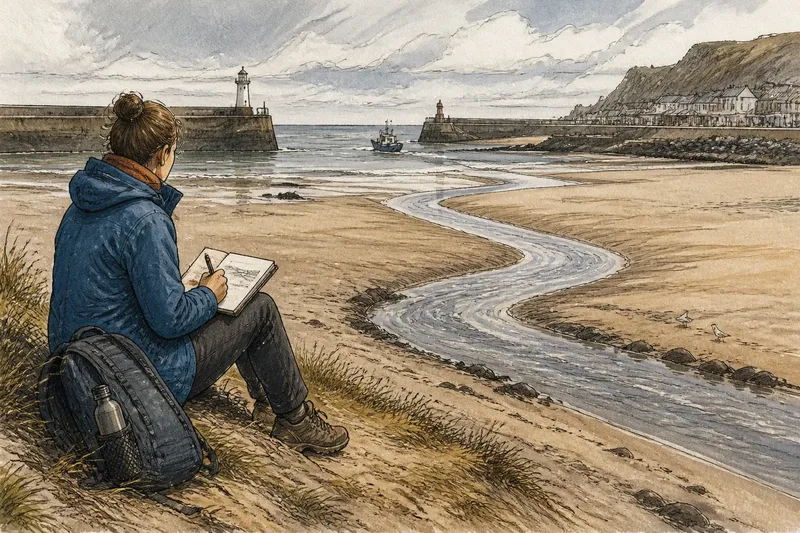
The common mistake in planning a low-tide shore walk is to treat the tide table as a promise that the whole beach will be open and easy to cross. A visible channel, soft sand or a working harbor entrance can change what is reachable, and a plan built around crossing the shore may leave little time to observe it. Choose one feature to notice instead, and let the route remain flexible.
What should one feature do for the walk?
Pick something visible from a place you can reach by a familiar public route: the curve of the beach edge, a channel cutting across exposed sand, or the opening between harbor walls. A single focus gives the walk a question without turning it into a survey. You are looking for how that feature appears from one point in time, not trying to explain every process that shaped it.
Before setting a date, check a local tide table for the place you intend to visit, then look at the access information for the beach or harbor. Tide predictions describe water levels, not the condition of every patch of shore. If the feature is obscured, or the route is closed, the walk can shift to a permitted viewpoint rather than forcing a closer look.
How can you plan the morning?
Use the week before the walk to choose a suitable low tide, check access notices, and decide where you will begin and turn back. A local council or harbor authority page may carry closures; a paper map or phone map can help identify paths and public entrances. Keep the route modest enough that you can return without relying on a particular stretch of exposed shore staying passable.
On the morning, check the tide table again and look at the weather and any local warnings. Pack ordinary walking shoes suited to the route, a warm layer, water, and a notebook or phone for a few observations. Follow posted signs and stay clear of working areas, seawalls and water that cuts off a return route.
At the shore, pause at the start rather than heading straight toward the feature. Note the time, the place you are standing, and what the water is doing in relation to a fixed landmark such as a pier end or harbor wall. Then choose a safe viewpoint and allow the feature to remain the subject, even if the best view is not the closest one.
What can you notice without measuring?
Describe visible relationships in plain language. A channel may appear to run toward the harbor entrance; the beach edge may bend around a rock outcrop; a line of wet sand may mark where water recently reached. These are observations, not claims about depth, current strength or how the shore will behave later.
Use a few repeated prompts in your notebook: Where does the feature begin and end? What does it touch? Which landmark helps locate it? What has changed since you arrived? Sketching a rough outline can be more useful than taking a close-up photograph with no sense of direction. If you take a picture, include a recognizable landmark when possible.
Imagine you arrive at a public beach intending to follow a channel toward a harbor entrance, but the channel crosses your route and the tide is already turning. You stay on the firm upper beach, sketch the channel’s visible course from a safe viewpoint, and record which harbor wall it seems to point toward. The expected observable result is a clear note about what you could see from that position, without treating the channel as a route to cross.
What if the view or route changes?
Fog, rain, glare and a crowded shore can make a feature hard to see. If the view is poor, record what prevents observation and choose a safer, more sheltered public vantage point; there is no need to complete a loop. If access has changed, follow the closure rather than substituting an informal path through dunes, private land or a working waterfront.
A turning tide also changes the purpose of the outing. Move back toward the established access route while you still have an uncomplicated return, and observe from land rather than trying to keep pace with the water. On a shore with complex hazards or uncertain access, use local authority advice and stay within the limits of the marked public route.
What do walkers often ask about low-tide shore walks?
How do I choose the right low tide?
Check a tide table specific to the location, then choose a time that leaves room for getting to the viewpoint and returning by the public route. A predicted low water does not mean every part of the shore will be exposed or accessible.
Can I walk across a channel?
Do not assume a visible channel is shallow, still or safe to cross. Observe it from the shore or a designated viewpoint, and keep to posted access routes.
What should I write down?
Record the time, viewpoint, visible landmarks, weather conditions and a short description of the feature’s position. Separating what you saw from what you infer makes your notes easier to revisit.
Should I take photographs?
Photographs can help you remember the view, but they work best with a note about where you stood and which direction you faced. Do not move closer or delay your return just to frame a picture.
How can the walk stay useful after you leave?
Before leaving the shore, make one final note about what became clearer and what remained uncertain. The point is not to produce a complete account of a beach, but to preserve a small, located observation that another visit could compare with care.
For planning a low-tide shore walk, that distinction matters: the shoreline is a shared place, and a view is only one part of how people use it. A careful note can acknowledge a channel, beach edge or harbor entrance without treating the feature as an obstacle to cross or a resource belonging to one visitor. Close the notebook with the route you used and the access point you returned to; that detail keeps the observation grounded in the public shore you actually walked.